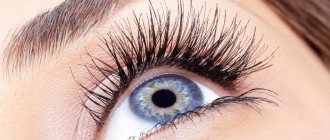
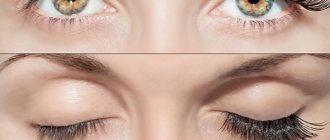
Features of the classic extension effect
If we consider natural eyelashes, then in almost every client they grow according to the same principle:
- the shortest hairs are located at the inner corner of the eye;
- the longest eyelashes are located closer to the center of the eye and continue to the outer corner;
- at the outermost corner, the eyelashes can either remain long or slightly shorten, but not as pronounced as at the outer corner.
The task of the master when applying extensions with a classic effect is to achieve the same result, that is, to repeat the characteristics of the growth and location of natural eyelashes, while working on each natural hair.
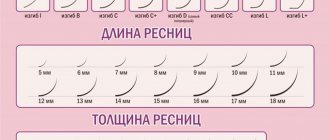
For extensions, synthetic hairs of 3 to 6 different sizes are most often used, usually from 5 to 11 mm, sometimes from 6-7 to 11-12. Curves for extension – B, C, D, more often C.
The classic effect of eyelash extensions is suitable for those girls who do not need visual correction of their eye shape. If your client has fairly harmonious facial features and does not want her eyelashes to look too unnatural, the classic effect will be the ideal solution for her.
Care instructions
If you choose classic eyelash extensions, you will be pleased with the volume of your eyelashes for about six weeks; experts advise making corrections every two weeks, because... living eyelashes are gradually renewed, grow, fall out, etc., respectively, eyelash extensions begin to look awkward and not beautiful. You also need to adhere to several rules:
- do not rub your eyelids;
- do not wet your eyes for the first 24 hours;
- do not use cotton pads;
- stay away from open flames;
- It is not recommended to use waterproof mascara;
- use a curling iron.
Classic extension schemes
Let's look at different eyelash extension schemes with a classic effect from different specialists for different clients.
It is important to take into account the fact that masters share their extension schemes with a classic effect in order to show how markings can be made for each specific client, what hair lengths to use on which segments of the eyelash line. You can always see what techniques the masters used on eyes of a particular shape, where they placed emphasis, how they distributed artificial eyelashes of various sizes along the eyelash line, how wide they made segments of different sizes, etc.
Under no circumstances should you take other people's schemes as a guide to action. They serve only so that you can use a large number of examples to determine the principle of constructing an extension scheme with a classic effect, and also receive a portion of inspiration. After all, a lash maker is a creative person who must constantly be in search of various techniques and technologies and be able to adapt to the needs of different clients. We will talk later in this article about how to build a scheme for extension with a classic effect, as well as how to use other people’s schemes to your advantage and how to avoid mistakes when working with schemes.
How to maintain rows when building extensions with a classic effect?
When applying extensions according to schemes with almost any effect, it is important to maintain rows, due to which it becomes possible to make the transitions between artificial hairs of different lengths as smooth as possible. Thus, the eyelash line becomes smooth, has no protrusions or sharp steps, and the result itself looks more neat and “clean.”
For example, in the Kim Kardashian effect, the whole point is precisely the presence of tufts of longer eyelashes that protrude from the eyelash edge. As for the natural effect, the specialists there also do not strive to achieve a perfectly smooth edge of the eyelash fabric so that the extensions look as natural as possible. In classic extensions, it is important to maintain rows and get a smooth eyelash edge without unnecessary protrusions.
Compliance with eyelash rows is the variation of the length and curvature of artificial hair in different eyelash rows in accordance with the characteristics of the eyelash line and eyelash rows. Moreover, changes in the choice of length and bend should be made at the points of transition from one size/bend to another.
For example, if, when transitioning from a hair of size 10 mm to 11 mm on the bottom row, in the top row you make a transition from 9 mm to 10 mm in the same place, then this joint will be visually very noticeable. It would be more correct to change the length gradually. For example, in the bottom row you make a transition from 10 mm to 11 mm, and on the top row you continue to extend eyelashes of 9 mm, and only after 3-7 eyelashes go to 10 mm, the joint will be smoother.
Personal approach
Each person has his own individual characteristics, and therefore, at the beginning of the procedure, a good master examines the eyelid area and clarifies the nuances, such as:
- length;
- density;
- bend;
- thickness.
In general, such extensions imply eyelashes that are extremely close to natural ones, with the effect of slight lengthening and bending. Thanks to eyelash extensions, it is possible to visually narrow or widen the eyes, and you can also create a doll-like or fox-like look. You should decide what kind of extension you want before visiting a specialist.
Editor's choice: Eyelid tattooing with shading, features of the procedure
It is worth noting that such extensions are more suitable for wearing every day, because... eyelashes after the procedure look like after a good and high-quality mascara:
- slightly thicker;
- curved;
- and slightly elongated.
If you want a spectacular result, you should consider other types of extensions, for example, a doll look.
When is it necessary to work on the eyelash rows?
Working with rows is an optional condition when building with a classic effect, since in some cases, maintaining rows will lead to disastrous results. For example, if your client has a narrow eyelash line (this usually happens in very young girls), the natural hairs are located very close to each other. In this case, growing eyelashes in rows will be like trying to put a few more things into an overfilled suitcase. Eyelash extensions in rows in a narrow eyelash line will fit too tightly to each other, bend from the given direction of growth and experience excessive load. The extension itself will look like a brush that is too tightly packed.
In this case, you should concentrate on working on one single row of eyelashes – the bottom one. It is also quite possible to ensure a smooth transition by alternating lengths at the transition point. If you mentally approximate the extension scheme at the transition point of lengths, the arrangement of eyelashes of different sizes will look something like this:
10 10 10 10 10 10 11 10 11 10 11 11 11
As you can see, in the middle, sizes 10 and 11 alternate for 5 lashes, after which a new length of 11 mm comes. This alternation allows you to achieve a smooth transition without working out the rows.
As for the medium and wide eyelash line, the rows there are more pronounced, the hairs are spaced at a greater distance from each other, so natural eyelashes appear more sparse. In this case, it is necessary to thicken it, working on several rows at once - two, three or more. Medium and wide eyelash lines are found mainly in older clients, less often - this is an anatomical feature of young clients. Over the years, the eyelash rows literally “diverge” to some distance from each other, and if at 20 years old a girl’s eyelash line was narrow, then at 40 years old it will probably be medium or wide.
It is worth working out the rows on the wide and middle eyelash lines in such a way that longer hairs are used on the bottom row, and a millimeter shorter on the top row. Moreover, on the top row the lengths increase and decrease according to the lengths of the bottom row. Since the rows of eyelashes are located on a line at different levels, differences in the lengths of artificial hairs make it possible to achieve a perfectly even edge. In addition, you can use hairs of the same length, but with different bends, in different rows:
- on the bottom row there is a more intense bend;
- on the top row there is a less intense bend.
With classic extensions, it is advisable to follow the rows. Otherwise, after extensions are applied, it will be noticeable on the open eye how the hairs of the upper row “travel” beyond the eyelash edge and get out of the general eyelash layer.
How to work with single hairs from the top and bottom rows
The hairs on the very top row, if they are single, can be left alone with extensions, since if synthetic eyelashes are added to them, they can stand out from the general eyelash row and greatly spoil the overall picture.
As for the lower row of eyelashes, there may also be single hairs growing under it that already need to be worked on - they are called eyelashes below the lash line. If you do not touch them, they, in contrast to the top ones, will also stand out from the overall picture and spoil the final result of the work. Therefore, working on eyelashes below the eyelash line is strictly necessary.
It is important to work with these hairs correctly. Incorrect extension will result in the lowest lashes pointing downwards. This will create the effect of an untidy eye or will look like the eyelashes urgently need correction. In addition, “hanging” hair extensions will fall into the client’s field of vision and interfere with the view. It is necessary to work with such hairs in a special way, and with correct extensions the result will be beautiful and complete.
Eyelashes below the lash line are treated as follows:
- The area of contact between natural hair and artificial hair should be smaller than with standard hair extensions. If you put a synthetic one on the entire surface of a natural eyelash, then it is the natural one that will give the direction to the artificial bristles, which is why they will sag down together.
- For extensions, it is better to choose hairs with an intense bend. The curl should be more curled than the eyelash extensions on the bottom row. This way, the synthetic eyelash will set the direction; it will be able to lift the natural hair, remove it from the client’s field of view and carefully place it in the general eyelash fabric.
When all the eyelash rows have been worked out, you need to comb the hairs and see if there are single eyelashes that are knocked out of the eyelash edge. Even if you follow all the rules for building up and working out rows, one or two hairs can “rebel” and fall out of the overall picture. In this case, it is better to remove these eyelashes completely so that the work is of better quality and accuracy.
Materials
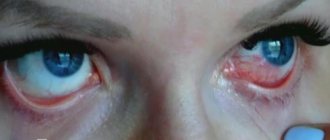
Failed eyelash extensions
If you use high-quality material for extensions, the eyelashes will “wear” better and will not become deformed.
Luxury eyelash extension manufacturers:
- Irisk Professional (produces durable, weightless and high-quality material in a different color palette);
Irisk products
- Dolce vit (this South Korean company produces false eyelashes of different colors and shapes);
- Masu (the products of this brand are high-quality and hypoallergenic).
The following material is used for eyelash extensions:
- Silk: the thickness of these eyelashes is medium, and the colors are different, so they are suitable for every day and for special occasions;
- Mink: mink is a light and thin material, suitable for those with weakened eyelashes;
- Sable: Sable hairs are thick and are not recommended for daily wear. They are built up for a special occasion for 2-3 days (removed with a special product), since they weigh down natural hairs;
- Silicone: silicone fibers are elastic and shiny, they are comfortable to wear - they do not break, do not wrinkle and hold their shape perfectly.
Step-by-step markup creation
A scheme for eyelash extensions should not be a direct guide to action for the master, as we have already determined. It is only a kind of plan that the lash maker consults during the work process. Let us repeat once again - you should not thoroughly follow other people’s schemes or apply the same scheme to different clients. An experienced master always creates a diagram himself personally for each visitor.
There is nothing complicated in constructing a diagram and creating markings for extension, but in order for the process not to take much time, you will have to gain experience and carry out more than one extension. But then you will be able to quickly and correctly draw up diagrams for different effects for each specific client. Each effect has its own principles for constructing a circuit, but there are no universal ones among them. Therefore, the master must himself analyze the condition of the client’s natural eyelashes in order to subsequently select the correct length, thickness and curl of the hairs, as well as correctly distribute them in the pattern.
How is marking done for eyelash extensions?
The steps for creating markup for classic and other effects are as follows:
1. The client should be placed on the couch on her back and asked to close her eyes. Then you should fix the lower eyelashes with special patches, pads or elastic medical tape.
2. Using any writing object (pen, marker, felt-tip pen, liner), the lash maker makes markings directly on the patch, tape or pad that secures the lower eyelashes. Marks are made on both eyes at the same time, and it is necessary to check the symmetry of their location. First, you should draw two straight lines that will extend from the outermost eyelashes in the outer and inner corners of the eye, and the direction of the lines should coincide with the direction of growth of these eyelashes. The length is not important, the main thing is that the lines are clearly visible.
3. Next, you need to find the central point on the eyelash line, which is located exactly in the middle between the points where the first two lines begin. It is also necessary to draw a line from the center, thereby dividing the basis of the marking in half. The direction of the line coincides with that of the growth of the eyelash located at the central point.
4. Next, the basis of the diagram needs to be divided into smaller segments. In the half located closer to the inner corner of the eye, it is worth highlighting three sectors, and in the second - four. Make sure that the lines dividing the base of the marking into sectors also “look” in the direction of eyelash growth. The width of the segments and their number can vary depending on the desired result and anatomical features of the client, as well as her wishes.
5. Next, in each segment there is a number indicating the length of the artificial hairs in millimeters. Eyelashes of the appropriate size will be located in a numbered sector. The numbers should be written directly inside the sectors so as not to get confused. First, you should determine the length of the hairs in the corners, then, in sectors, gradually increase them by one point towards the center. The longest hairs in classic extensions should be placed closer to the outer corner of the eye.
Clarifying the markings for eyelash extensions with a doll effect
If you have taken the principles described above for constructing a diagram as a basis and made the markup, the next step will be to refine it. No matter how well you prepare to create the markings, after this you need to check everything several more times and clarify the width and number of sectors, confirm the lengths and bends planned for use. All this is done to ensure that the final result suits and pleases the client, and is also aimed at emphasizing natural beauty or eliminating visual imperfections. In this case, only an individual approach will help achieve an ideal and, importantly, unique result.
For classic extensions, it is very important that the result of the extension looks as harmonious as possible and as close to naturalness as possible. This result can be achieved using the simplest trick - choose artificial eyelashes of such a size that they match the length of natural hairs in the inner and outer corners. And then the lengths can be increased as needed.
Types of artificial eyelashes
Eyelashes vary in length and thickness:
- mink;
- sable;
- silk.
The names do not indicate the type of material; the thickness is distinguished by the names, and a special material called monofilament is used for eyelashes.
Mink is a fine fiber that is as close to natural as possible.
Editor's choice: Usma oil for eyelash growth
Silk - medium-thick eyelashes, have the appearance of well-painted eyelashes, such eyelashes will be heavy on the eyelids.
Sable has the thickest and fluffiest eyelashes. This type of eyelashes is worth getting extensions if your own eyelashes are healthy and strong, otherwise they will quickly break off under the weight of the extensions.
Mistakes when applying eyelash extensions with a classic effect according to schemes
One of the most important mistakes that lash makers make when working with schemes for various effects is working in full accordance with them. Someone else's or your own designs designed for other people are not suitable for other clients. During work, the master must be labile - constantly monitor the intermediate result: evaluate what the lengths and bends look like, how smooth the transitions are, where the location of the transitions can be changed, where it is better to place the longest hairs, etc. During the extension process, many planned actions may change , only one thing is important - to achieve the desired effect. Therefore, even if you have created the perfect personal scheme from scratch, you should not take it as the last resort. Today, for most masters, marking is just a “sketch” that allows you to form a picture of the extension in your head. And professionals already start from their own thoughts when working.
Wizards can also make the following mistakes:
- The lash maker does not pay attention to the direction of the eyelashes or sets it incorrectly when forming a beam (with volumetric extensions), paying attention only to the size of the synthetic hairs in the pattern.
- The master does not pay attention to possible asymmetry of the eyes. If they are different in size, shape or fit, it is impossible to use two identical patterns. In any case, eyelash extensions will look somewhat exaggerated compared to the usual natural look, so they will only emphasize the asymmetry. In this case, it’s worth sketching out the diagram before you start preparing the eyelashes for extensions. Somewhere you will have to “play” with the lengths, somewhere – with bends and thickness, at some points of the eyelash row you will have to attach bundles, etc.
- The master incorrectly performs the transition between lengths, which is why a step is formed.
- The lashmaker does not carefully study the client’s natural eyelashes before extensions, does not adequately assess the complexity of the work, and tries not to experiment or change the situation during the procedure, as he is afraid of ruining the result. If you strictly follow the template, at some points the result may not be as ideal as originally planned. For example, if a client's eyelashes grow crookedly, it may be worth making a small adjustment to the pattern to solve the problem rather than make it worse. The master can choose an eyelash of a different thickness, length or curve, so that one hair extension fits beautifully into the overall canvas, and does not get out and spoil the whole picture.
- When constructing or using someone else's diagram as a basis, the master does not use modeling principles. Perhaps the client should move the point with the longest eyelashes closer to the outer corner, in specific places apply a more intense bend to correct the shape of the eyelid, etc. By the way, it is very important to take into account the compatibility of the shape of the eyelashes extended according to the scheme with the shape of the eyebrows. If eyebrows initially do not allow you to correct imperfections in the shape or location of the eyes, it is worth providing the client with recommendations on eyebrow architecture.
Let’s summarize once again: the main mistake a lashmaker makes when working with extension schemes is the lack of flexibility and the ability to adapt to changing circumstances, as well as thorough adherence to the scheme. Lability skills allow you to notice inaccuracies in extensions in time and remove them, which is also useful for masters who are not afraid to experiment. It is these lash makers who achieve enormous success in the industry. And the more successful the master, the greater the demand for his services, the more regular clients he has and the higher his earnings. In addition, the development of proprietary methods and extension techniques allows masters to loudly declare themselves and earn additional money through training courses.
How long do eyelash extensions last?
The minimum period for wearing synthetic hair, taking into account the lack of required care, is about 3 weeks. If you follow all the necessary recommendations of a specialist (do not damage the eyelashes, expose them to moisture as little as possible, do not sleep on your stomach), the result after extensions can last up to 1.5 months. With timely correction, the wearing period increases significantly.
Effective eyelash care products that will help clean your makeup well and preserve every hair.
Here are simple recommendations for care after eyelash extensions that will extend the wear time:
- do not sleep with your face in the pillow, because in this position the eyelashes will break and quickly fall off;
- Use mascara as little as possible; washing off makeup frequently will only do harm;
- touch your eyes with your hands as little as possible;
- use a special brush for combing;
- contact with water as little as possible, this can shorten the life of artificial eyelashes;
- Do not forget about timely correction, this will not only preserve the effect of the extension, but also the health of natural hairs.
The technique of eyelash volume enhancement is attractive because it provides the most natural effect. An increased number of hairs in this way looks natural and attractive. With them you can swim in the sea, pool, sunbathe in the solarium and engage in active sports. If you follow simple recommendations, your eyelash extensions will last a long time without causing discomfort.
