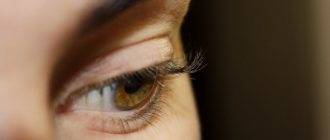
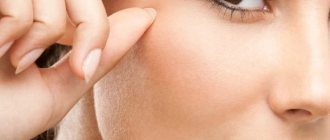
Is eyelash extensions dangerous for your eyelashes?
Eyelash extensions allow a woman to save time on daily application of decorative cosmetics to her eyes.
Despite the comparative safety of the procedure, unlike permanent makeup,
there are myths about the dangers of eyelash extensions and about the procedure itself:
- fracture and loss of natural eyelashes;
- negative effect of glue on the skin of the eyelids;
- short duration of the effect.
Fracture of natural eyelashes is possible in case of incorrect choice of thin eyelash substrates for hair extensions. Loss can be caused by unprofessional removal of artificial eyelashes. Resinous adhesives can harm the skin of the eyelids and cause burns to the eye mucosa if low-quality glue is used.
The short duration of the effect is due to the lack of professionalism of the specialist, the low quality of the material used, improper care of the eyelashes after the procedure and untimely correction, which should be carried out once every 3-4 weeks.
What personal qualities should a lash maker have?
To become a real professional, it is not enough to take courses and gain first experience in extensions; it is also very important to work on yourself.
Qualities that a sought-after master lash maker should have
- The desire and interest in extensions will always come first. If you are not sure that you want to do this, then the training, effort and money spent will go nowhere.
- Are you patient enough? Eyelash extensions are a painstaking task: patience, accuracy and calm will be necessary for a novice artist. Patience will also come in handy when dealing with clients.
- Are you resilient? Are you ready to spend half a day sitting? Your back and neck will be under constant tension.
- Fine motor skills are also important: they are directly related to dexterity, the ability to work with tiny objects such as artificial eyelashes.
Who is contraindicated for the extension procedure?
Eyelash extensions are strictly contraindicated if a woman has a number of diseases and other indicators:
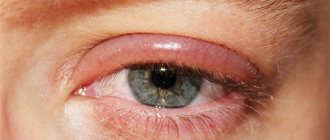
- chronic conjunctivitis, the exacerbation of which can be provoked by the use of even high-quality glue;
- allergies to cosmetics, which can be excluded by a preliminary detailed ophthalmological examination;
- wearing contact lenses, which increase the risk of developing an allergy to extension materials;
- thinness and fragility of natural eyelashes, which can completely fall out after extensions;
- Unhealthy skin, including increased oiliness and dryness: oiliness will lead to a short-lasting build-up effect. Dry skin requires the use of special oily cosmetics, which will also lead to a short period of wearing artificial eyelashes.
What is necessary
Can I do my own eyelash extensions at home? Yes, you just need to purchase everything you need for this:
- Eyelashes.
- Glue.
- Cotton swab.
- Tweezers.
- Vegetable oil.
- Cardboard.
It is necessary to take into account that the glue that is included in the set with eyelashes does not securely fix the hairs in 80% of cases. The classic composition is of low quality. The components of the product can cause allergies. It is advisable to separately select high-quality glue.
Choosing eyelashes for extensions: shape, length, thickness, manufacturer
Before you apply eyelash extensions at home, you should decide on the desired look - the choice of extension technique and materials used depends on this. For eyelash extensions use:
- natural fibersmade from hair. Without creating a weighting effect, such eyelashes look most natural. Their advantage is hypoallergenicity. Disadvantages include the difficulty of performing the procedure yourself;
- silk hairs, giving volume and length. They are ideal for events. They look inappropriate for everyday wear;
- mink eyelashes that look natural and light. Ideal for everyday wear. The main disadvantage of mink material is the increased risk of developing an allergic reaction and itchy eyes;
- sable hairs , despite their naturalness, are a heavy extension material, which is why they are not suitable for women with weakened natural eyelashes. The stunning effect they create is short-lived.
Unlike the eyelash technique, the beam technique is much simpler. The artificial eyelashes used are collected in a bun. This extension technique does not require additional professional skills and takes no more than 15–20 minutes. However, the final result is inferior in appearance to eyelash extensions.
The main parameters when choosing eyelashes are length, thickness and curl. The length of eyelash extensions should suit the shape of the face: on a small, thin face, long eyelashes look unnatural and vulgar. Thick, long eyelashes look harmonious on a large, wide face.
The golden rule of lash makers says: “The ideal length of artificial fibers exceeds their own by no more than 2–4 mm.
Depending on the area of the eyelid, the range of hair lengths is 4–18 mm.” Professional lash makers consider hairs No. 8, 10 and 12 to be the best option.
Before you extend eyelashes yourself at home, you need to select the optimal hair thickness, the range of which is from 0.1 to 0.25 mm with an interval of 0.05 mm:
- 0.1 mm – option for a natural soft look;
- 0.15 mm – a more formal option, creating the effect of eyelashes painted with mascara;
- 0.20 mm is a bright image, however, heavy hair extensions of this thickness are not recommended for women with weakened natural eyelashes;
- 0.25 mm - an extravagant look is guaranteed, but the effect is extremely short-lived.
According to the shape of the bend they are distinguished:
- J and I eyelashes with minimal curl;
- categories B, C and their combinations allow you to achieve the perfect look with smooth curves. Most popular among leshmakers;
- L and L++ eyelashes are used to correct the shape of the eye. Visually create greater openness of view;
- U and CC curves give the popular youthful doll-eye effect.
Eyelashes also differ in color. However, the most popular are the classics - black and dark brown shades.
Currently, trusted manufacturers in the lash industry are Dolce Vita, Ag Beauty, City Lashes, Macy. Professional lash makers also recommend “Glams”, “Novel”, etc.
Don’t miss the most popular article in the section: Plasmolifting of the face - what it is, how it is carried out, results, photos before and after the procedure.
Required tools and materials
Before you can apply eyelash extensions yourself at home, you need to purchase the required tools and materials:
- hand sanitizer with antibacterial effect;
- eye makeup remover tailored to your skin type;
- spray degreaser or tonic to remove fatty film from eyelids and eyelashes;
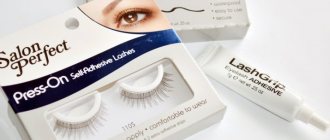
- hypoallergenic glue;
- a set of eyelashes;
- 2 tweezers: one with straight ends for extensions, the second with curved edges for correction;
- gel pads, regular paper tape or cotton pads;
- glue container;
- toothpicks and cotton swabs;
- magnifying mirror;
- lamp;
- a tray for laying out all tools and materials.
Today there are 2 main methods of extension:
- bundle extensions - gluing a bunch of artificial hairs at once;
- eyelash extension – gluing each hair separately.
Preparation for the procedure
Any cosmetic procedure requires preliminary preparation. At this stage, everyone who has taken up this matter needs to decide for what purpose you are going to perform this procedure: do you need a one-time effect or a long-term one, do you want to extend eyelashes partially or along the entire row, do you want “doll eyes” or do you prefer more soul natural option, etc.
Also, under no circumstances should eyelash extensions be done if you have various eye diseases or inflammatory processes. Before the procedure, be sure to make sure that your eyes are 100% healthy. It is also desirable that the eyelashes are as healthy as possible: nourished, moisturized, well-groomed. Since chemical compounds will affect the health of your natural eyelashes, it is therefore very important that they are strong to begin with.
For weakened eyelashes, if you decide to undergo the procedure, you should not glue tufts or villi that are too large and heavy.
Next, you will learn how to do eyelash extensions yourself.
Materials
- Eyelashes. They come in a wide variety: long, short, individual, bundle, etc. The choice depends on the purpose of the extension.
- Glue. There are different types of adhesives for different types of eyelashes. Most of them are based on natural resins. Their advantages are hypoallergenicity and, of course, ease of use. They do not set instantly, but after some time. Thanks to this, it is possible to correct the eyelashes and “plant” them where needed. Such formulations must be stored in the refrigerator.
Don't forget to pay attention to the production date and expiration date! - Degreaser. It is needed to eliminate oiliness in the treated area. If you skip the step with this product, the glue may not cope with its task due to the greasy content.
- Tweezers. It is necessary for more convenient application of eyelashes to the desired area. Usually they use tweezers with the narrowest tips, but if you don’t have those, then you can do it with ordinary ones.
- Removal fluid. The liquid is intended for removing unnecessary or poorly glued eyelashes. It can be replaced without damage with any fatty cream (for example, baby cream) or natural cosmetic oil.
- Pads under the lower eyelid, eyelash comb, glue container, cotton pads, ear sticks.
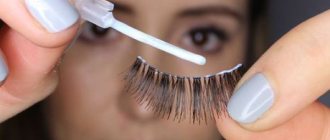
Step by Step Guide to Eyelash Extensions
- First of all, be sure to remove all makeup from your eyes and degrease your eyelashes using a special product. Place a special pad on the lower eyelid or replace it with an adhesive plaster. But it’s better, of course, not to use the last option, so as not to further injure delicate skin. Gently comb your eyelashes.
- Open the package of lashes, prepare the ones you will use, and set the rest aside to avoid tangling.
- Place some glue on a piece of paper or cardboard.
Using tweezers, very carefully dip the edge of the lint or tuft into the glue. A very small amount is enough. Don't be afraid that he won't grab it. But if there is an excess of it, there is a risk of spoiling the whole picture and significantly complicating your work.Using a cotton swab or a second tweezers, separate the real eyelash near the spot and carefully apply the artificial one to its very base. Try to use fibers of different lengths in a row to create the most natural and attractive look. But again, it all depends on personal preference.
- Do the same with all the desired areas. Pay special attention to ensure that the curve and direction of artificial eyelashes coincide with natural ones.
- After treating both eyes, you need to dry the eyelashes a little with cold air. To do this, use a hair dryer at the lowest power setting.
- This completes the procedure. All that remains is to remove the pads from your lower eyelids and admire your beautiful and prettier self in the mirror.
https://www.youtube.com/watch?v=zxA3rqhFZ_8
Step-by-step instructions for bun extensions
Bundle extensions are carried out very quickly. The look becomes expressive and deep. However, the effect of such a procedure is less natural compared to eyelash extensions and the wearing period of bundled eyelashes is also significantly shorter.
Bundles differ in the method of attachment:
- nodular have a small knot at the point where the cilia join into a bundle. During extensions, this knot is glued to the eyelid. The main disadvantage of such beams is the visibility of the nodules;
- knotless ones have a flat lash attachment; gluing is done directly on the eyelid.
Before extensions, hands are treated with an antibacterial agent.
The existing makeup is removed from the eyes, the lower natural eyelashes are fixed to the skin of the face using gel pads or paper tape to facilitate the extension procedure.
Fixation is carried out from the inner corner of the eye. Natural eyelashes, the base for artificial hairs, are treated with a degreaser using a cotton swab. After completing the preliminary procedures, you should begin building up.
With beam extensions, an average of 15–20 beams are glued to each eye.
The technique is as follows:
- drop glue onto glass or into a special container;
- Dip the ends of the tweezers in the adhesive and grab a bunch of eyelashes;
- Using the second tweezers, the natural eyelashes are pulled apart at the site where the artificial lash is supposed to be attached, and this lash is glued to the resulting area;
- the bundle is fixed with tweezers at the base of the natural eyelashes or glued to the skin of the eyelids;
- The gluing process is carried out from the outer to the inner corners of the eye. The tufts must be secured evenly, otherwise holes will form in the eyelashes, which will negatively affect the final result.
Recommendations
To like the result, you need to use professional advice:
- For a natural look, craftsmen use individual eyelashes of different lengths.
- The hairs are dipped in glue to the middle.
- You should not attach eyelashes in a row. It is advisable to increase several pieces, but in 2 stages. This is necessary for the glue to dry.
- To obtain thickness, the hairs are glued into the interlash space.
- The eyelashes should be separated to prevent them from sticking together.
- The glued hairs do not touch the skin of the eyelid; they must be clearly fixed on the natural eyelash.
- If the eyelashes are sparse, then 2 hairs are glued on.
- Throughout the entire process, ensure that the eyelashes are distributed evenly.
- If the eyelash is poorly fixed, then it should not be torn off, it must be moistened with oil and removed with a cotton swab.
- The eyes should be opened a few minutes after completing the activity to allow the glue to dry.
To ensure long-lasting results, do not rub your eyes. To wash off cosmetics, you need to use special products. There is no need to apply greasy creams to the skin around the eyes. It is prohibited to visit the sauna and bathhouse.
Step-by-step instructions for individual eyelash extensions
Professional lash makers prefer eyelash extensions due to their greater naturalness and effectiveness. The most popular and accessible is the Japanese technique, which includes the following steps carried out after preliminary procedures:
- sorting eyelashes by length, thickness and curl;
- degreasing tweezers, your own eyelashes and their growth line;
- attaching a gel pad or wet pad under the lower eyelid that will protect the skin of the eyes;
- thorough combing and separation of natural eyelashes;
- picking up a separate artificial hair by the tip with tweezers, dipping it in glue and gluing it onto your own base eyelash, retreating 0.5–1 mm from the eyelash growth line. The remaining natural eyelashes are pushed back with a toothpick to simplify the work;
- fixing the hair extensions by lightly pressing at the place of gluing.
Eyelash extensions are carried out in a direction similar to beam attachment. More reliable fixation of the extended fibers is achieved by lying down for 5–10 minutes with your eyes closed at the end of the procedure.
Step-by-step instructions for eyelash extensions at home
Leshmakers also distinguish American and Indonesian techniques, which differ from Japanese only in the material used: the first involves building up silicone or rubber fibers. The second uses a special adhesive composition enriched with nutritional vitamin complexes.
Experts, advising on how to extend eyelashes individually at home, offer the creation of various images using appropriate extension effects, performed by gluing artificial fibers of different lengths depending on the desired result. There are:
- natural effect – is more popular. It represents a gradual increase in the length of the growing fiber to the outside of the eye. The effect gives expressiveness to the look and eliminates the additional use of mascara;
- the discharged effect is achieved by alternating the length of artificial hairs;
- the fox (“cat’s eye”) effect is achieved by a sharp transition from eyelashes of shorter length to longer ones;
- squirrel effect - similar to fox effect, the difference is in increasing the length of the section of short eyelashes: only a few long artificial hairs are fixed on the outside of the eye;
- The doll effect is achieved by choosing eyelashes of categories C++ and U of the same length. Length of eyelashes – 12–15 mm. The look becomes flirtatious. This technique is most popular among young people.
Today, eyelash extension techniques that create the effect of 2, 3, 4, 5D volumes have become especially popular.
The procedure consists of gluing several artificial fibers (2, 3, 4 or 5) onto one eyelash, depending on the selected effect. The working materials are most often core hairs. Professional eyelash makers advise performing extensions in stages, alternating by gluing 25-30 eyelashes on each eye. The final stage involves visual control of the number of eyelash extensions and replenishment of sparse gaps, if any.
Extension technologies
In fact, all the different types of extensions can be divided into 2 groups.
- Bundle – artificial hairs are pre-assembled into ready-made bundles, which are glued to the eyelash edge. The shape, length and thickness of eyelashes can be selected according to your wishes. Beam technology is much simpler and faster: in a salon such a procedure takes no more than an hour. Beginners are recommended to start by attaching the beams.
The advantage of the solution is the speed of transformation and the variety of options. Minus - correction will be required after 2 weeks: the bundles are heavier than individual hairs and do not hold as firmly. But if one eyelash disappears from view, no one will notice its loss, but the disappearance of an entire bunch requires immediate action.
- Eyelash - a separate artificial hair is glued to each eyelash. This kind of work is much more difficult to do: it requires pinpoint precision when fixing the hair, because it must not only take the correct position, but also the correct direction. However, eyelash extensions provide a much more durable and much longer-lasting result.
In addition, it is not necessary to actually extend all the eyelashes. By placing longer or steeply curved artificial hairs in the corners of the eyes, alternating with short ones, you can get interesting solutions: to create the effect of doll eyelashes, a fox look, or a squirrel look.
This procedure takes at least 2 hours and requires accuracy and extreme care. Impatient young ladies cannot cope with this.
- Volumetric extensions are essentially a type of eyelash extension, but with variations: 2, 3, or even more are attached to one natural hair - Hollywood volume. The length and thickness of the eyelashes changes very significantly, so this option is more suitable for special occasions or special occasions - a stage premiere, filming.
This procedure takes 3–5 hours in the salon. It is very difficult to do at home: the work requires precise finger movements and constant tension. But when doing it on your own, you have to hold your hands suspended, which makes the work much more difficult.
Pros and cons of different techniques
Eyelash and beam extension techniques have their advantages and disadvantages. Lack of skill and ignorance of how to properly extend eyelashes individually at home leads to a negative result:
- inappropriate doll-like appearance;
- damage to the eye mucosa from adhesive fumes;
- loss of time (5-6 independent work) without achieving the desired image;
- the ability to adjust the extension only after a month.
The positive aspects of eyelash extensions are the long period of wearing artificial eyelashes, the naturalness of the image and the ability to choose the desired look effect.
The disadvantages of beam extensions include the short-lasting effect of the procedure and a less natural appearance compared to eyelash extensions. The advantages are the simplicity of the procedure, saving time during extensions and the cost of the service in the salon.
Safety and Precautions
Safety precautions and precautions are required at every stage of the procedure. The sterility of reusable instruments, the use of disposable consumables and the cleanliness of the workplace are extremely important.
A professional lash maker uses only high-quality materials. In order to identify a possible allergic reaction, a woman initially has a pair of hairs grown in the corner of her eye. After 20 minutes, in the absence of allergic manifestations, the procedure is carried out in full.
Before extensions, it is necessary to undergo a complete ophthalmological examination in order to exclude various eye diseases. Extensions for asthma, psoriasis, ARVI and a number of other diseases are strictly prohibited.
The safety rules for the extension technique used are determined by the qualifications and experience of the technician: the ability to separate weakened and healthy eyelashes will help avoid their fragility and loss after removing the artificial ones.
Sterilization of reusable instruments is carried out in two stages:
- disinfection of tweezers in a special solution;
- heat treatment.
The couch and desk should be treated. It is mandatory to use a disposable sheet and a cap on a woman’s head.
By following safety rules when applying extensions, you can avoid serious ophthalmological diseases.
Don't miss the most popular article in the section: Hyaluronic acid in tablets. Benefits, how to take, reviews from doctors and effectiveness.
Eyelash removal
Eyelashes can get boring, so you can remove them. However, you cannot do the following:
- Pull out as the hairs will be removed with real eyelashes.
- Use soap to wash off.
- Remove eyelashes during menstruation, as the pain may be more intense.
If your eyes are inflamed, you should not remove them until recovery. Hair removal will be painless if you use the following methods:
- Special solution.
- Oil.
- Fat cream.
- Medicine.
Remover is a special liquid. They treat the eyelids. The product dissolves the glue. It is better to use olive or castor oils. Apply a few drops to your eyelids at night. The cream allows you to eliminate eyelashes painlessly. You just need to choose the right consistency. The cream should be fat and thick. The eyelashes fall out after a few hours.
Medicines should be used in extreme cases. If it is necessary to urgently remove hairs, then a remedy for conjunctivitis is used. After a few minutes, you can remove the eyelashes. Hair extensions and their removal are not difficult, the main thing is to do everything according to the rules.
Care for eyelash extensions
Using this opportunity to grow eyelashes yourself at home, with proper care, you can maintain the results for several weeks. Absolutely forbidden:
- rub your eyes;
- sleep on your stomach with your face buried in the pillow;
- use of oily cosmetics;
- long visit to the bathhouse, sauna and swimming pool.
After extensions, it is advisable to cleanse the skin with an antibacterial tonic.
Oily skin requires additional degreasing with tonic. It is recommended to remove eyelash extensions in a salon, which will avoid their fragility in the future.
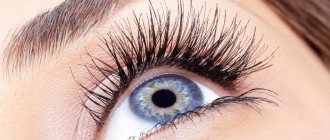
Choice of eyelashes
Only with a careful approach can you grow your own eyelashes. Photos of the results are shown in the article. You also need to choose the right eyelashes:
- Partial extension. It will be possible to increase the thickness of natural eyelashes. You should choose short natural fiber eyelashes. The length of the hairs affects the result. For example, if they are artificial and the same as natural ones, then the build-up will not be visible. Short eyelashes allow you to get a doll-like look.
- Hypertrophied effect. Long and thick eyelash extensions are performed. The result will be an unnatural result, which is typical for shocking images. It should be taken into account that the length of the eyelashes should be comfortable.
- Holiday options. There are many eyelashes to create an evening look. It is enough to visit a specialized store to see sets with rhinestones, feathers, and multi-colored hairs.